Hey everyone, I just wanted to let you know that I am having my baby next week so that is why I haven't been doing much blogging lately. I am planning on getting some awesome guest posters so watch out for those. Thanks for your support.

Monday, November 26, 2012
Monday, October 22, 2012
Perfect Red Lip


Makeup Monday ~ Seven Steps To A Perfect Red Lip
A bold red lip is always beautiful and for some, a little scary to wear. For most women it is the fear of it looking awful. Here are seven tips to help you feel more comfortable with those bold colors and achieve the perfect red lip.

1. Start by moisturizing the lips with lip balm or moisturizer.

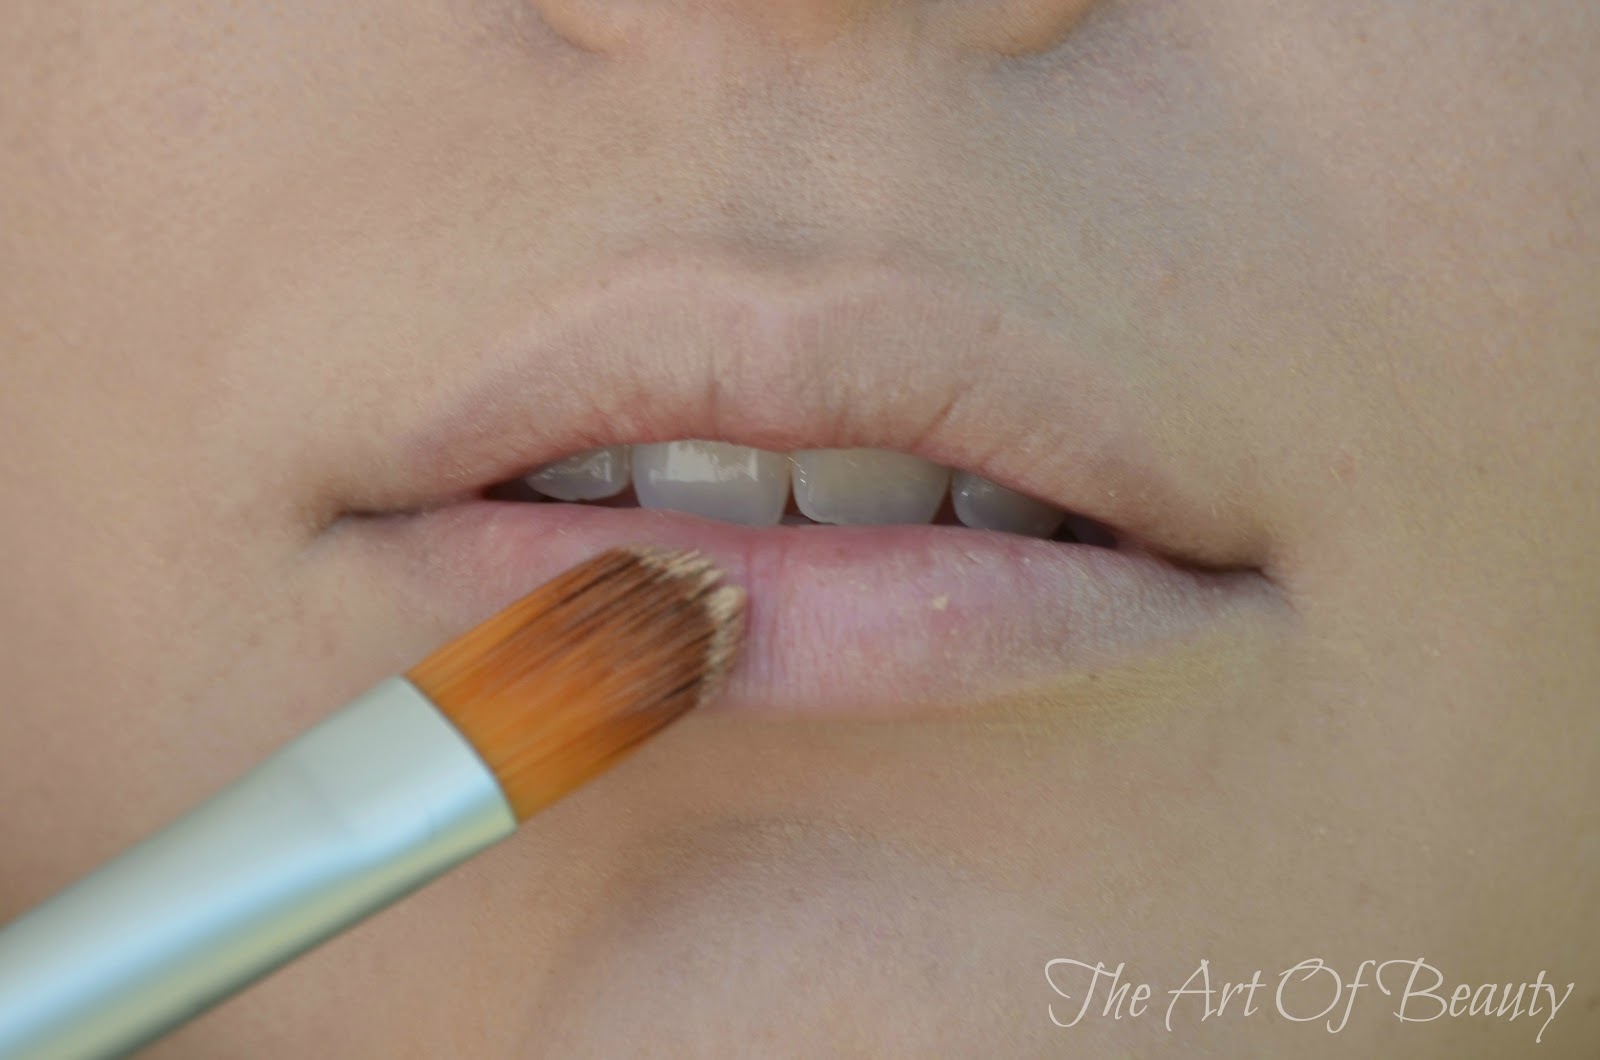
2. Using a gentle brush, exfoliate the lips to remove any loose dry skin.

3. Apply concealer or foundation to the lips to help the lipstick color look more bold as well as help you achieve a better line.

4. Line the lips. As long as the outside is what you want the inner lip doesn't need to be perfect.

5. Fill in the lips with the desired color. It is best to use a color that matches the liner.

6. Use concealer or foundation to fix any mistakes or perfect the line of the lips.

7. Add gloss if you want a shiny lip and to help the lips look bigger.

Monday, October 15, 2012
Baby Doll Lip


Makeup Monday ~ Baby Doll Lip Tutorial
I have been having so much fun playing around with different quick makeup ideas for Halloween. My cute sister inlaw has been kind enough to let me use her as a model multiple times. Here is a quick tutorial on how to change the shape of your lips for any kind of event. Have fun!

1. Start with clean moist lip.
2. Apply concealer and foundation to make your lips the same color as your skin.

3. Draw the desired shape with a lip pencil. I wend above and below the natural lip line to help give it a more dramatic pouty look.

4. Fill in the liner with lipstick or gloss to add depth and shine. I love this look in all different colors especially black for Halloween.
Friday, October 12, 2012
Halloween Caviar Nails


Halloween Caviar Nails ~ Candy Corn
Here is a really cute idea for Halloween using the Caviar Nail application. All you have to do is follow the steps given here only use three different color stripes. Do each stripe one at a time to make it easier to apply the beads. I love this look because it makes it look like candy. Have so much fun!
Wednesday, October 10, 2012
Caviar Nail Tutorial

 Caviar Nail Tutorial
I love it when new nail trends come out and I get to play with the different colors and ideas. Here is a quick tutorial for caviar nails that are really fun and easy. Keep an eye out for fun holiday ideas with this trend.

To start you will need to pick your color and micro beads. I got a set of six micro beads at Micheal's Craft store for around $7. You can get larger sets or buy them individually as well.

1. Apply a base coat and your first layer of polish letting them both dry completely.

2. To apply the micro beads you will want to work with one nail at a time. Add second coat of polish to first nail.

3. While nail is still very wet sprinkle beads onto nail over a bowl to catch falling beads. Make sure to cover entire nail with beads.

4. Once beads are on the nail press gently to secure the beads to the nail. Follow steps 2, 3, and 4 for each nail.


5. Once you have finished applying beads to each nail clean up the edges to get rid of any extra beads.

6. Make sure to let each nail dry completely before applying the top coat. Once they are dry apply a layer of top coat making sure to cover entire nail.

7. Let them dry and have fun! I love these nails because the possibilities are endless.
Monday, October 8, 2012
Sexy Vampire Lips

Makeup Monday ~ Sexy Vampire Lips
 Halloween is almost here, do you know what you want to be? This is by far my favorite holiday and I look forward to thinking up fun ideas all year. Here is a quick tutorial on how to get an awesome, easy, sexy vampire lip.
1. Start with a clean moisturized face. Add foundation applying some to the lips as well.

2. Line the lips with black liner to the desired shape bringing it a little bit into the center.

3. Apply red liner to the center of the lips.

4. Blend the black into the red making sure to leave the very center red.

5. Clean around the edges and add a red gloss to blend and add shine.

6. Add a little bit of fake blood to the outsides of the mouth and anywhere else you desire.

7. You can top it off with some fake teeth or wear as is for a sexy halloween look.
Friday, September 28, 2012
Tomato Basil Creamy Vegan Pasta
In my quest to be a healthier, happier me, I have found many wonderful recipes I love that are healthy and very delicious. This recipe is one of my favorites and I love to make it as often as my family will eat it(which is quite often). This year we planted a garden and have been having lots of tomatoes that we don't know what to do with so this is my fall back. This recipe is courtesy of VeganYumYum.


Healthy Habits ~ Tomato Basil Creamy Vegan Pasta
Serves two
RECIPE:
- 1 Large, ripe tomato (2 cups roughly chopped, 1 1/2 cups blended)
- 1/2 Cups Raw Cashews
- 1 Tbs Tomato Paste
- 1/4 Cup Water
- 2 Tbs Olive Oil
- 2-4 Cloves Garlic, minced, optional (I always add it)
- 6 Ounces (ish) Whole Wheat Spaghetti (I used fettuccine in the photo but prefer whole wheat spaghetti)
- 1 tsp Salt
- 2-3 Tbs Wine or Water, Optional
- 1-2 tsp Freshly Cracked, Coarse Black Pepper
- 1 Large Handful Fresh Basil Leaves, Chopped
DIRECTIONS:
- Put a large pot of salted water on to boil.
- Core the tomato, then roughly chop it. Add it to your blender, seeds, skin and all. Add cashews, tomato paste, and water. Blend until very smooth.
- Add olive oil to large saute pan over medium-high heat. Add garlic and saute until golden, being careful not to burn. Once water is boiling, add pasta. Pour sauce from the blender into the saute pan and bring to a simmer. Add salt and let cook for 4-5 minutes, stirring occasionally.
- If desired add wine/water to thin out the sauce (I recommend doing this). Taste and season more if necessary. Let simmer until pasta is finished cooking. Once pasta is cooked, drain. Add pasta to the saute pan with black pepper and freshly chopped basil leaves. Toss to coat. Serve immediately, garnish with more pepper and basil.
Wednesday, September 26, 2012
Cuts For A Cause
October is, as many people know, Breast Cancer Awareness Month and my friends over at Azalea Day Spa & Salon are doing a wonderful event to support this great cause. On October 18th you can get your hair cut at a discounted price and all of the proceeds go to the HUNTSMAN CANCER INSTITUTE. Space is limited so book your appointment today. For more information on this event CLICK HERE.

Lets all bring more awareness to this cause that effects so many of our friends and loved ones.
Monday, September 24, 2012
How to apply false eyelashes


Makeup Monday ~ How to apply false eyelashes
As a makeup artist I get asked a lot by my clients how to apply false lashes. For most people they don't really know where to start or how to choose the right lashes for what look they are trying to achieve. I suggest purchasing a few different kinds of lashes and trying them out to find what feels best and goes well with the look you want. There are different kinds of false lashes from dramatic to everyday wear. Here is a quick tutorial on how to apply everyday false eyelashes.

You will need: Eyelashes, glue, cotton swabs, tweezers and small scissors.

Start with finishing your eye makeup, including liner, before applying the lashes.

Measure the length of false lashes to the outside corner of the eye before attaching completely with glue.

Cut lashes at the outer edge where longest length is.

Remeasure to make sure lashes line up where you want them.

Add glue to cotton swab.

Apply the glue to strip of lashes. Let glue sit for a few seconds until it is sticky but no longer super wet.

Apply the lashes using tweezers to accurately line them up with the base of natural lashes.

Apply mascara to lower and upper lashes to incorporate natural lashes. Do not apply very much mascara, you want to avoid separating false lashes and clumping.

I hope this has been an informative post and helps answer some of your lash questions.
Subscribe to:
Posts (Atom)